Saturday, January 23, 2016

Do You Want To Build A Snowman ~ Edible Craft

During our snow storm, I have tried desperately to find ways to entertain the kids and keep them off of their electronics most of the day light hours.  You'd think the snow would deter them, but sometimes, it's just too darn cold to play in the snow.  HAHAHA.  YES, I really said that. Today, however, they have NOT been on their electronics much AT ALL.  They shoveled a neighbors driveway for $15 and they have been sleigh ridding.

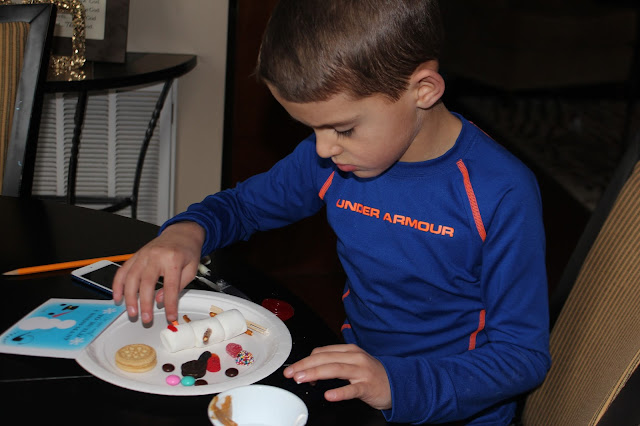
I made the "Do You Want To Build A Snowman" labels (above) and created a plate of gourmet candies, from the Fresh Market. I told the kids to build a snowman. Afterwards, they could eat him. 
The plate included: large marshmallows, licorice pinwheels, gourmet mints, pretzel sticks. mini oreos, a lemon cookie, gumdrops, licorice drops, black m&ms, an orange jelly belly, and an orange good and plenty!
I gave them a teaspoon of marshmallow fluff, a teaspoon of peanut butter, a toothpick, and a skewer fork.  These were their assembly tools.  
And the kids enjoyed getting creative.  
I know from these photos, Ty doesn't look like he's having fun, but he was.  He's just like his mom though.  Everything has to be perfect, so he was annoyed that his pieces were being stubborn and not adhering with permanency.  
Here is Ty's, what I can, Mexican snowman.  He looks like he is ready to go to the South Of The Border.
Jax worked very intently.
His snowman looked Chinese.
Liley worked very daintily.  
Liley's was the most creative.  She made a pipe and a broom stick!
I have uploaded my label and will include it, FREE, here, if you want to use it!!!

Do You Want To Build A Snowman? ~ Snack Plate


I spotted these ADORABLE, Olaf napkins, cups, and paper plates at Wal-mart, the night before our blizzard.  I HAD to have them! 
Today, mid-morning, I made my three snow babies a "Do you want to build a snowman?" snack plate.
I simply grabbed things from the pantry that I thought reminded me AND them of  what you would use to build a snowman.  I tried to keep it healthy and portion controlled.  
I did SPOT Olaf yogurt cups too!!! Of course, I had to have them!!!
The snack plate consisted of: 
3 different sized circles of Provolone cheese (making the snowman).
Petite carrot sticks (making the noses).
Fresh Raspberries (making the pipe)
Peanuts (making the buttons and eyes)
(1) Mini Oreo and (1) Cookies and Cream Cookies (making the top hat)
Pretzel Sticks (making the arms).

Friday, January 22, 2016

SNOW- Snow Cones!!!

It was SNOW much fun to make these homemade snow cones.  I shopped for the items on Thursday! I had always seen snow cone paper cups at Michaels, but I was not interested in having a snow cone machine.  As soon as there was news about the snowmagedon coming, I was all about doing some fun snow things. I am NOT a fan of anything wet or cold and snow just happens to contain BOTH.  So, I am "THAT" mom that stays in doors, smiles from the warm house, through the windows, and prepares yummy breakfasts, lunches, dinners, snacks, crafts, and desserts!!! The kids don't seem to mind.  Ty is almost 11.  He is used to it.  

Are you interested in making these yummy snow-snow cones?  FIRST, here's the items you will need:
1. Cute paper cups, snow cone papers, or bowls! Of course regular bowls will work, but it's SNOW much more fun to eat them the way a TRUE snow cone is typically eaten.  I found our wrappers at Michael's Craft where the cake boss stuff is...fairly hidden.

2. Kool-aid Packets.  I just chose every color of the rainbow.  I thought it would be fun!
3. Sugar - 1 pounds per 6 packets.
4.  Water
5. Squeeze Bottles - Mine came from Michaels.  

6. SNOW!

7. Willing Hands to Work! 
8. Willing Mouths to Eat!

The directions are quite simple.  FIRST, measure out ONE cup of sugar and ONE cup of water per packet of Kool-aid.
Put the water and sugar in a pot.  BRING to a boil.  Stir.  Turn your burner down to SIMMER.  Simmer for 3 minutes. Remove the pot from the burner.  Pour in your Kool-aid packet.  Stir.
Let the syrup COOL! How perfect is it that I could let the syrup COOL outside, in the snow?!?!
Meanwhile, I printed out some adorable fruit, clip art, to match the flavors of our Kool-aid.  The lime slice didn't have eye balls, so I drew "his" face on.  LOL! Our flavors were cherry, orange, lemonade, lemon-lime, blue raspberry, and grape.
Using a SMALL funnel, pour the syrup into the squeeze bottles.  I LOVE how my bottles had the caps to match the syrup flavors.
 
Attach the fruit pictures/labels so the kids do NOT have to ask, "What flavor is this again?"
Fill up the cute snow cone cups with SNOW! Our snow is NOT hard packable snow yet.  It's still soft and fluffy. I think hard packed snow would make for a more photogenic snow cone. Haha.
Tell the kids it's TIME to dig in and Walaa!
We were able to fill the squeeze bottles to the way top and we have enough left over to freeze for next Winter.  It stores well up to one year.
Jax chose green and blue first!
Lilah chose purple and blue. 
Eventually, the kids took it upon theirselves to continue re-filling their cups with snow and making their own snow cones. Sigh... I guess #portioncontrol is NOT an option on SNOW days!!!
Ty actually thought the snow cones were a tad sweet and HE NEVER complains about anything being too sweet.  Jax and Lilah, on the other hand, are on #2 and #3.  LOL! I think it's time to test out snow cream now! I've never made it before, but I have a good recipe from one of Darren's steel brokers.  I am not eating sweets, so sadly, I am not partaking in any of these SNOW fun desserts.