Don't allow this colorful snack to confuse you! My hubby kept saying, "You better put a note in that crayon box to ensure the teachers don't try to color with those pretzels!" Haha. You'd think the delicious smell, as they opened the box, of white chocolate, would cause them to know it's an edible treat, OR maybe they would think they were scented crayons. Now a days, nothing surprises me. LOL! I'd have to say this is by far my favorite "FOOD ART" I have made in a reallllllllllllly long time. NOTHING is more perfect that a ROY G. BIV treat to photograph. It's just so photogenic. Hehe.
The directions are ridiculously SIMPLE. Purchase any type of chocolate wafers (the colors of your choice) and pretzel sticks. I chose the primary colors. I used the TALL pretzel rods this time. Using a serrated knife, gently place a small cut down the middle of the rod, and snap. It creates a clean break. One pretzel rod gives you two "crayons". Next time I make these, I want to use the small braided pretzels. My plan was to pencil sharpen the tip of the chocolate, to create a REAL sharpened crayon look, but the rod was too big for my sharpener.
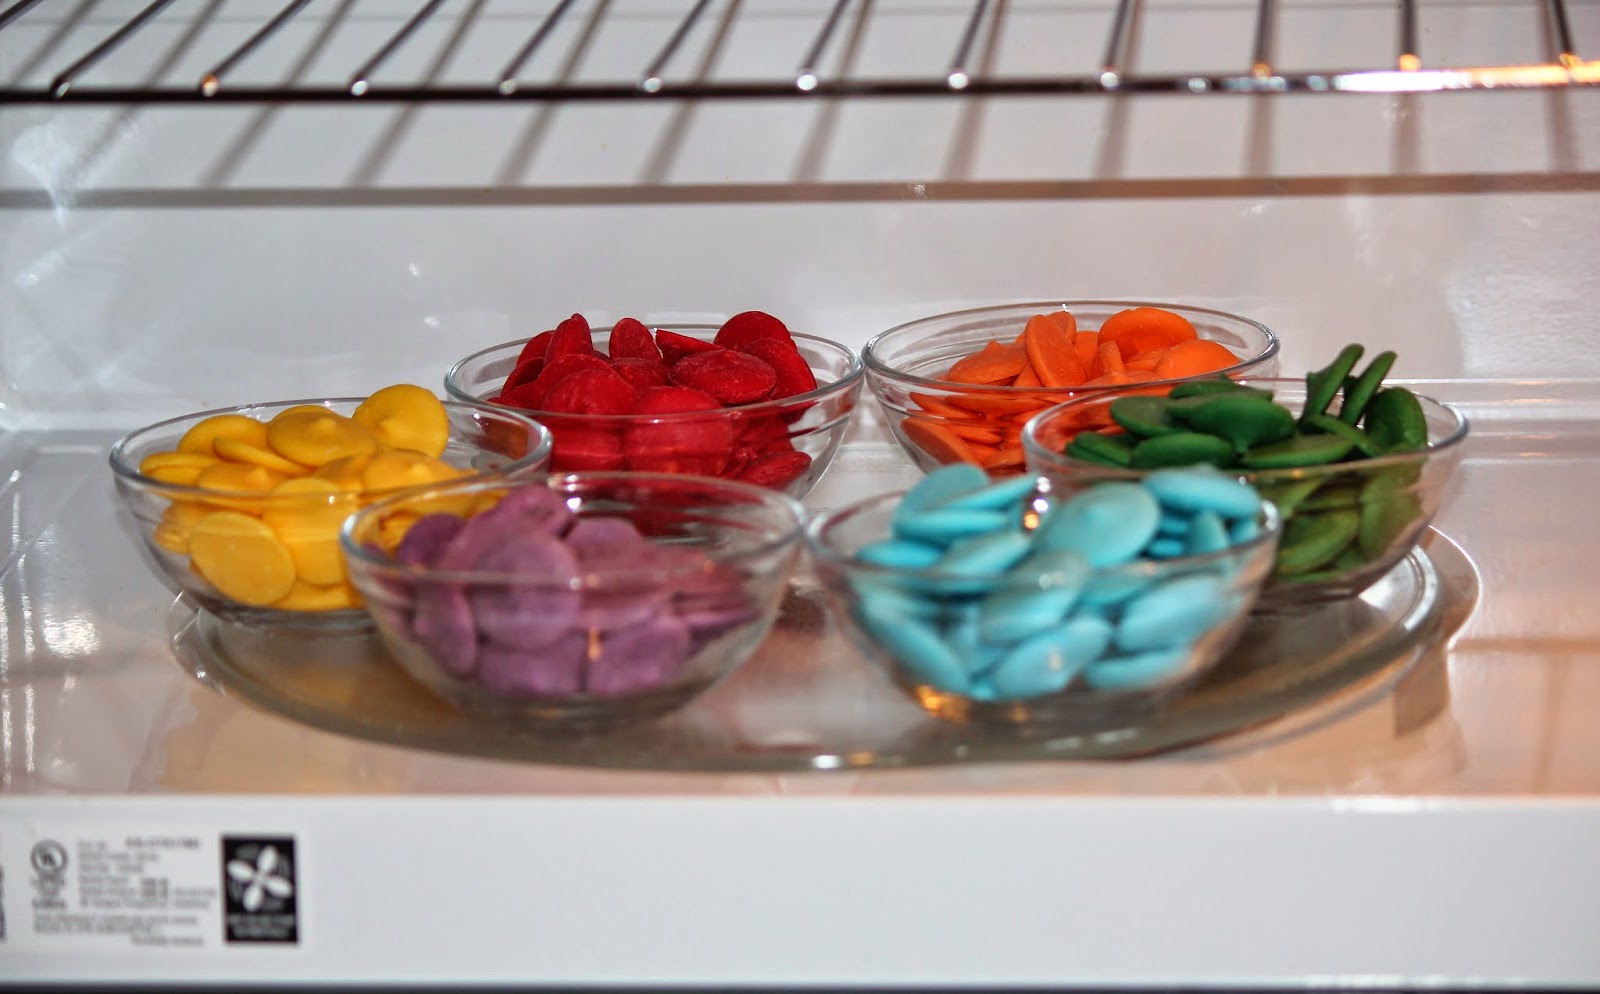
I placed each colored chocolate in a separate glass bowl. I LOVE these bowls. They come from the Dollar Tree - 6 for $1.00. Pier 1 sells ONE bowl for $6.95. LOL! Surprised? As you know the Dollar Tree is my favorite store. I microwaved the chocolate on 30 second intervals. Be careful NOT to burn the chocolate or it will cause your treat to taste burnt.
Below is a picture of the melted chocolate!!! I used individual butter knives to mix the chocolate, which worked fine, but I suggest mini rubber spatulas. Using this tool will allow you to scrape the chocolate off of the sides. You don't want to waste any chocolate, it's expensive.
Next, dip each end of the pretzel into the melted chocolate. I didn't worry about covering the the entire pretzel, although this could easily be done, it would be longer to complete. The wrapper covers the entire pretzel anyway, so I didn't feel the need to cover it entirely. Place the dipped rods into the refrigerator for about 10 minutes, allowing the chocolate to completely set.
Once I removed the chocolate covered pretzel rods from the fridge, I noticed the dried chocolate, on the rods, looked a tad messy, so I trimmed/shaved the sides of the "crayons". The colorful shavings looks so pretty! Shaving these rods allowed the label to fit more accurately on the "crayon".
Next, make crayon labels and print onto colored printer paper. BE SURE to use the thin copy paper. Cardstock paper is very difficult to roll and manipulate. Next time, I will add my own special touch. Instead of the wrapper saying "Crayon", I will put, "D is for Dixon" or whatever the teacher's name is!
I was in a rush to finish these up, so wrapping them precisely did NOT happen. I would have like to have used glue dots or my double sided tape to seal the wrapper. Instead, I just used scotch tape. I hate that you can see the tape, on the outside of the wrapper, but the presentation is still gorgeous.
Once again, my dishes were colorful and fun to do!
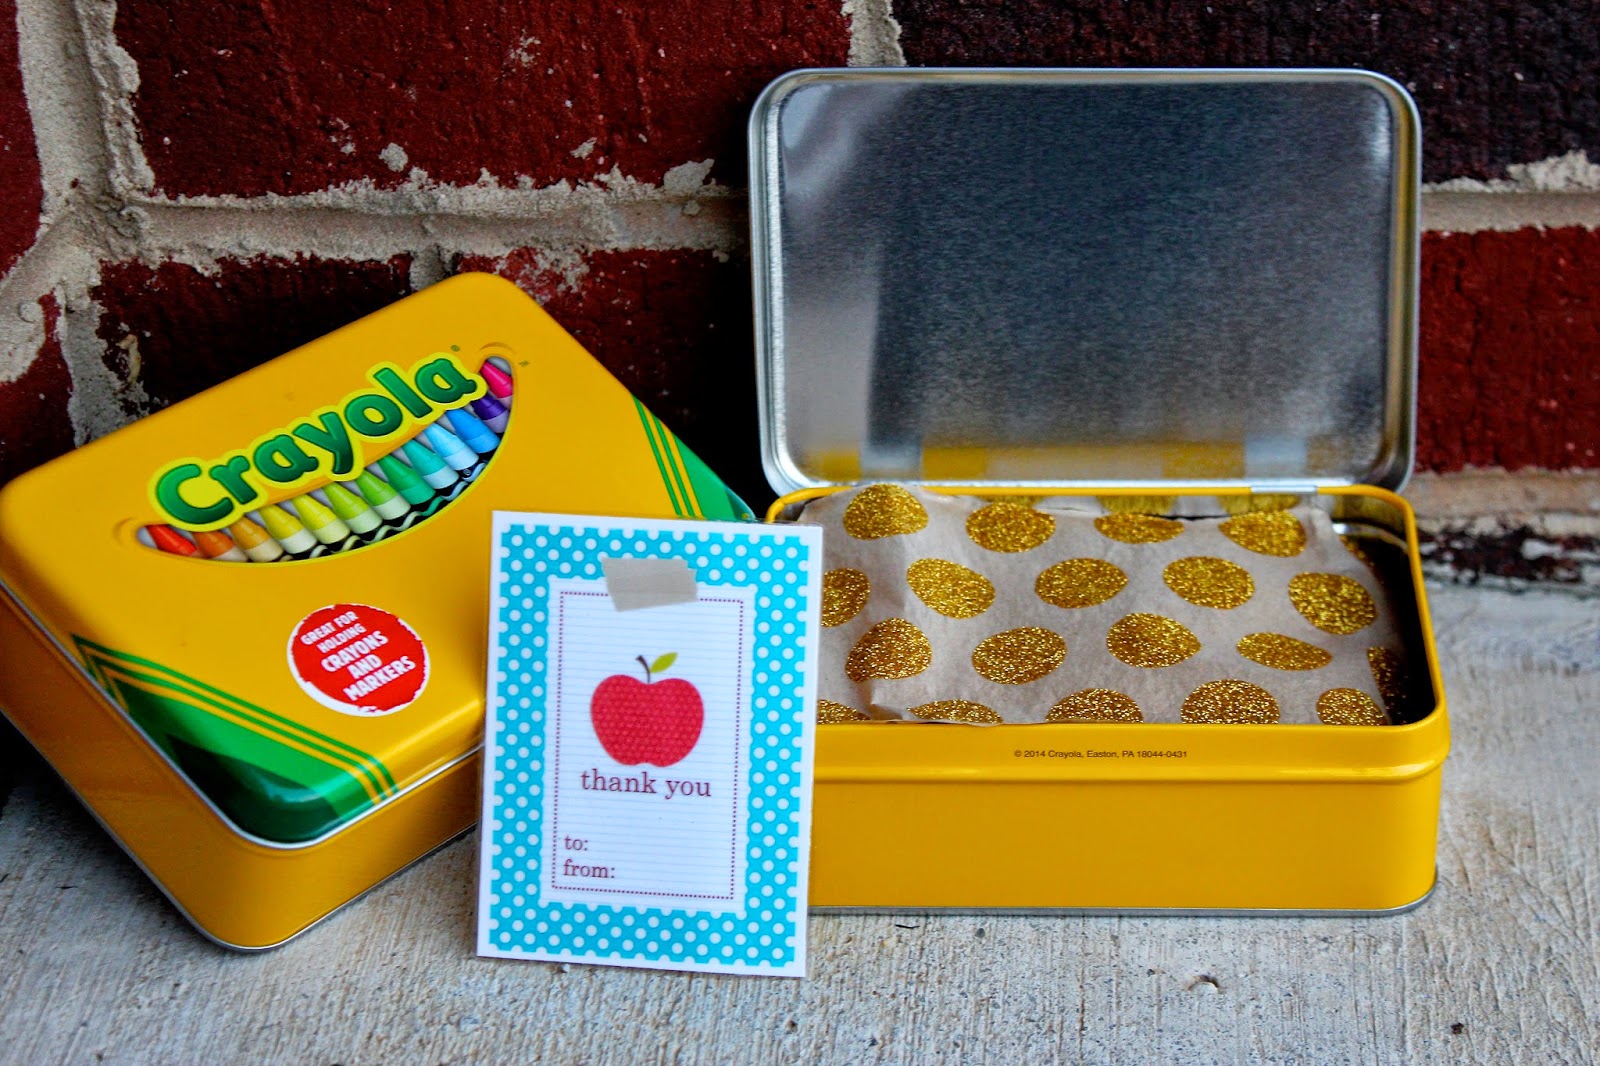
I was ecstatic when I spotted these crayola crayon tins, while in the check out line I literally started talking to myself, I was so excited!!!! What a perfect way to present the "crayons". TARGET was the store where I spotted these tins. The tins were $2.99.
Isn't the finished look GORGEOUS!!!!
I wrapped the crayons up, in some gorgeous, glittered tissue paper, from the DOLLAR TREE, and wala!!!!
This is the MOST colorful snack E-V-E-R!!! Ms. Dixon has already contacted me and said she is walking around the school showing all of her associates the creative gift she received today!!! I thought it was PERFECT for a Kindergarten teacher, but I also gave some to Ty's teacher and Ms. Robyn, the kids' bus driver!


Love love! They look yummy too!
ReplyDeleteThese turned out great and the tins were a perfect find!
ReplyDelete